This article will guide you through creating a Committee.
Accessing Committee Configuration
1. Log in to your Member365 Administrator Dashboard.
2. On the top bar, click ‘Configuration‘
3. In the ‘Committees’ section, click ‘Setup‘.
Creating a Committee
4. Click ‘Create Committee
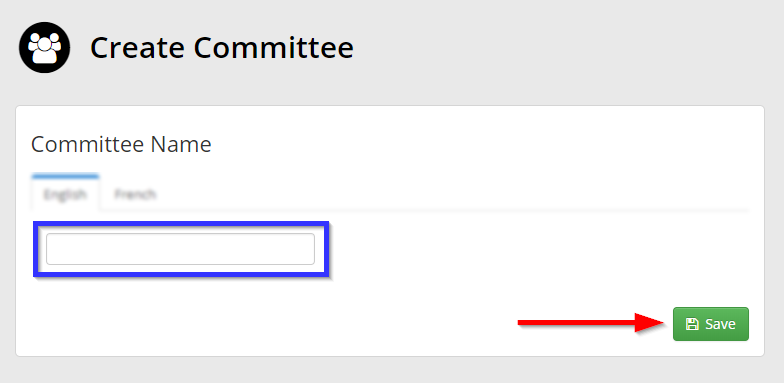
5. Enter a name for this Committee in the text box, and then click ‘Save‘.

6. Enter a description for this Committee in the indicated text box, and then click ‘Workspace‘ if you wish to enable a Workspace for this Committee. Otherwise, skip to the last step of this guide.

Creating a Workspace
7. First ensure that the toggle shown below is set to green; if it is not, then the options indicated below will not appear. Use the indicated text boxes to enter a name and welcome message for this workspace.

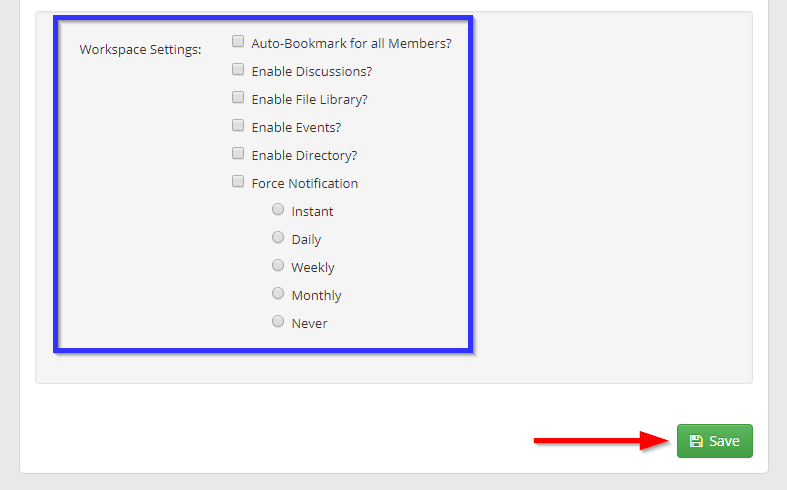
8. Scroll down the page to find additional options.

9. Once you are done, click ‘Save‘.
Congratulations, you have created a Committee and its workspace!
Comments
Please sign in to leave a comment.